Back to TheWorxHub for Senior Living Main Menu
Using the Location Manager
Locations define where the work is being done, and where your assets are located. Locations can be built in a hierarchy structure, with layers of top level locations and sub-locations.
To access the location manager in TheWorxHub:
- Click on the Settings tab, then select the Location tab.
- Click on Location Manager.
How to Add a Top Level Location
The location manager organizes locations alphanumerically. If a location does not have any sub-locations it will be listed at the bottom of the location manager.
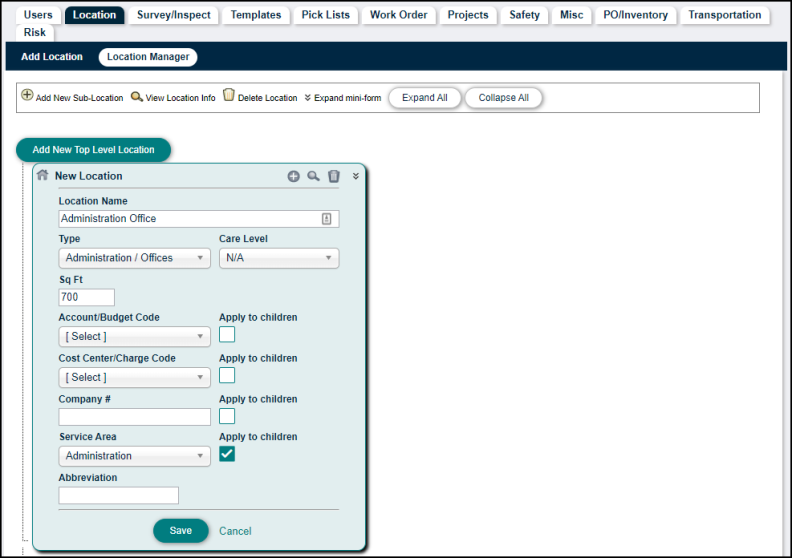
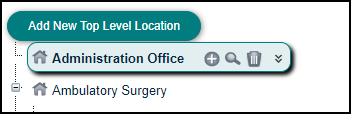
- To add a top level location, click the Add New Top Level Location button.
- A new node will automatically populate at the top of the location manager called "New Location".
- Hover your mouse over the node and click on the double arrow icon (
 ) to expand the mini-form.
 - Enter any applicable information for the location you are adding, including Location Name, Type, Care Level, Sq Ft, Floorplan, and Company #.
- Select a Service Area if you would like the responsible party that is assigned to that area to receive a notification when a work order is created for this location. *Note: If you check the box next to Apply to children, the Service Area will automatically be assigned to all sub-locations tied to this top level location.
- Click Save to add this location to TheWorxHub.
- To add any additional details for the location, hover your mouse over the new location in the manager and click the magnifying glass icon (
 ).
).
How to Add a Sub-Location
- To add a sub-location, hover your mouse over the top level location and click the plus sign icon (
 ).
). - Enter any applicable information for the sub-location you are adding, including Location Name, Type, Care Level, Sq Ft, Floorplan, and Company #.
- Select a Service Area if you would like the responsible party that is assigned to that area to receive a notification when a work order is created for this location. *Note: If you check the box next to Apply to children, the Service Area will automatically be assigned to all sub-locations tied to this sub-location.
- Click Save to add this sub-location to TheWorxHub.
- To add any additional details for the sub-location, hover your mouse over the new sub-location in the location manager and click the magnifying glass icon ().
How to Remove Locations
Locations can be archived or deleted from TheWorxHub. *Note: We highly recommend archiving a location in order to preserve the historical data tied to it. You should only delete a location if there is no data tied to it.
Archiving a Location
Before archiving a location, be sure to remove it from any open work orders, projects, or assets. You do not need to remove the location from any closed or historical work orders, projects, or assets. The system will preserve this closed and historical data so you are still able to search or report on the location.
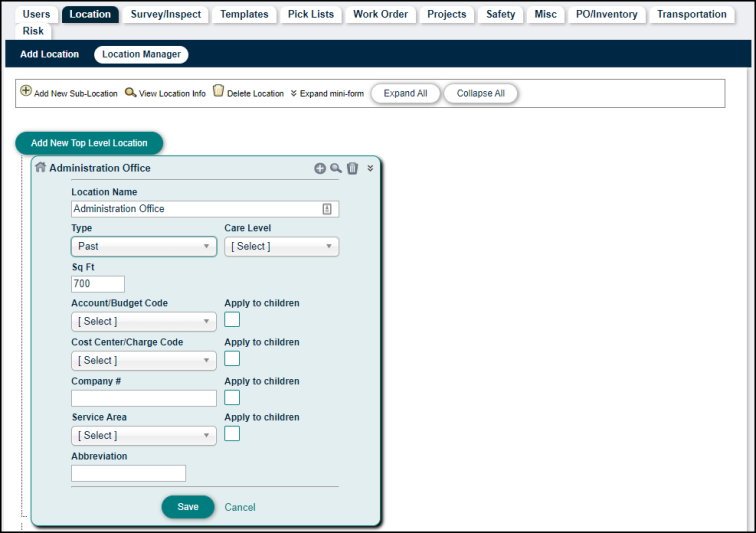
- If the location has sub-locations, hover your mouse over each sub-location and click the double arrow icon ().
- Change the Type to Past, then click Save.
- Once all sub-locations have been marked as Past, hover your mouse over the top level location and click the double arrow icon ().
- Change the Type to Past, then click Save.
Deleting a Location
- Hover your mouse over the location and click on the trash can icon (
 ).
).
- In the pop-up window, select Delete if you are sure you want to delete the location or click Cancel to go back. *Note: Deleting a location will remove the location from all data in the system and you will no longer be able to search or report on that location.
How to Move Locations
Locations and sub-locations can be moved within the location manager. *Note: We highly encourage you to contact Client Services for assistance before moving any locations.
- Expand the top level location where the sub-location to be moved currently exists, by clicking the plus sign (
 ) to the left of the location name.
 - Expand the top level location that the sub-location will be moved to, by clicking the plus sign (
 ) to the left of the location name.
 - Click Toggle Bulk Selection at the bottom of the location manager. *Note: Be sure to only click the button one time and then proceed to the next step.
- Hover your mouse over the sub-location to be moved and check the box next to the sub-location name.
- Hover your mouse over the top level location that the sub-location will be moved to and click Make selected units a child of this unit.
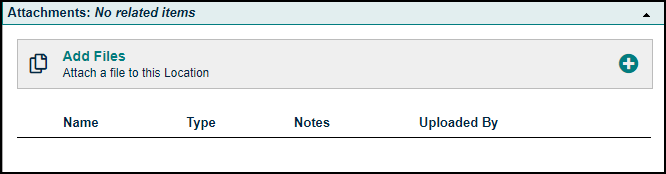
Adding Attachments to a Location
You can add any attachments from your computer, the web, or from a Dropbox account to a Location.
- From the Location form, click on Attachments to expand this panel.
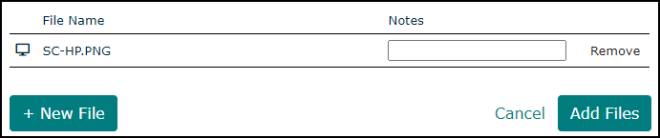
- Click the Add Files link.
- The File Selection window will display a list of files recently uploaded to the File Library.
-
Use the Search field to search for additional files.
-
Check the box for any file you would like to attach to the location, then click the Add Files button.
-
If the file does not currently exist in the library, click the +New File button to attach the file to the location.
-
In the window that appears, choose the source of the attachment. *Note: If a new image or document is attached to the project, it will also be uploaded to the File Library.
-
Select Choose File to upload a file from your computer.
-
Select Dropbox to link to a file in a Dropbox account.
-
Select URL to enter a link to a document or file on a web page.
-
-
If you have selected the wrong file, click the Remove link and repeat this process to select the correct file.
-
Enter a note or description of the file in the optional Notes field, then click the Add Files button.